2.1 Microscopy and Cell Biology
KEY CONCEPTS
By the end of this section, you will be able to do the following:
- Explain the role of microscopy in characterizing cell structure
- Compare and contrast light microscopy and electron microscopy
- Evaluate how technological advances in microscopy improved resolving power
At the core of cell biology is our knowledge about cell structure. It is difficult to understand things like cell function and evolution if we cannot see cells or their components. While cells vary in size (Figure 1.11), we generally cannot see individual cells with the unaided eye. The development and refinement of microscopes (micro- = “small”; -scope = “to look at”) was important to starting the field of cell biology because these tools can magnify objects. Light microscopes were the earliest tools of cell biologists, allowing the visualization of whole cells and some larger organelles like nuclei, chloroplasts, and mitochondria. Electron microscopes were developed more recently (1930s), and allow the visualization of much smaller cellular components like ribosomes and membranes. This chapter section will cover some basics of how these microscopes work and the main types of microscopy that cell biologists use. To understand this, we must discuss the limit of resolution
Links to Learning
For another perspective on cell size, try the HowBig interactive at this site.
Magnification, Resolving Power, and Resolution
Two parameters that are important in microscopy are magnification and resolving power. Magnification is the process of enlarging an object in appearance. Resolving power is the ability to distinguish two adjacent structures as separate: the higher the resolution, the better the image’s clarity and detail. The higher the resolving power of an instrument, the more we can magnify images and see structures clearly. The resolving power is determined by the limit of resolution, which is how far apart two objects must be to appear as separate entities.
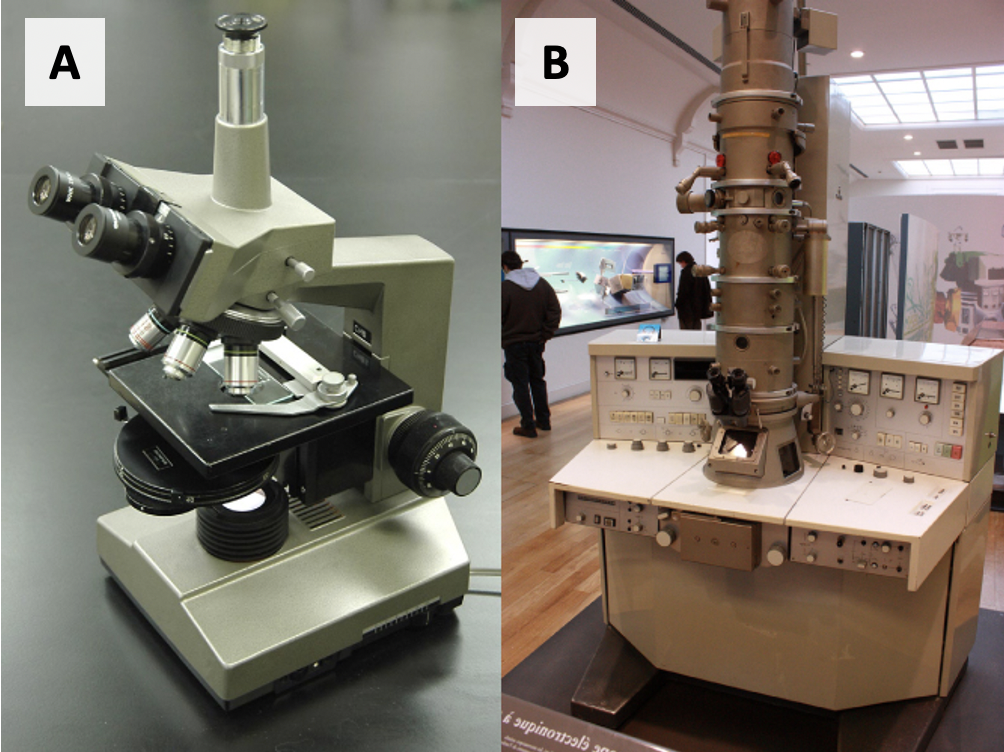
The limit of resolution differs depending on the technology you’re using (Figure 2.2). For example, the limit of resolution of the unaided human eye is usually about 200 µm; two objects must be at least this distance apart (200 µm = 0.2 mm) for our eyes to see them as separate. The very best light microscopes have a limit of resolution of 200 nm, one thousand (1,000) times better than the unaided eye. This low limit of resolution allows for higher resolving power and magnification that allows us to see structures that are larger than 200 nm, such as mitochondria and chloroplasts (usually 1 – 5µm wide), and nuclei (usually 6 – 10 µm wide). There are still many structures that are smaller than 200 nm within cells; for example a ribosome is only 20 to 30 nm wide, and a membrane is usually only 8 to 10 nm thick. To see these structures, we need to use electron microscopes, which can have a limit of resolution as low as 2 nm, one hundred thousand times better than the unaided eye. We’ll discuss why electron microscopes have such high resolving power later in this chapter section.

Light Microscopy
In a light microscope (Figure 2.2a), visible light passes and bends through (at least two) lenses to enable the user to see the specimen. In a traditional compound microscope, light passes through a condenser lens, then the specimen, then an objective lens, and finally an ocular lens (Figure 2.3). The optics of a microscope’s lenses change the image orientation that the user sees. A specimen that is right-side up and facing right on the microscope slide will appear upside-down and facing left when one views through a microscope, and vice versa. Similarly, if one moves the slide left while looking through the microscope, it will appear to move right, and if one moves it down, it will seem to move up. This occurs because microscopes use two sets of lenses (objective and ocular) to magnify the image. Because of the manner by which light travels through the lenses, this two lens system produces an inverted image. (Binocular, or dissecting microscopes, work in a similar manner, but include an additional magnification system that makes the final image appear to be upright).

Brightfield microscopy and stains
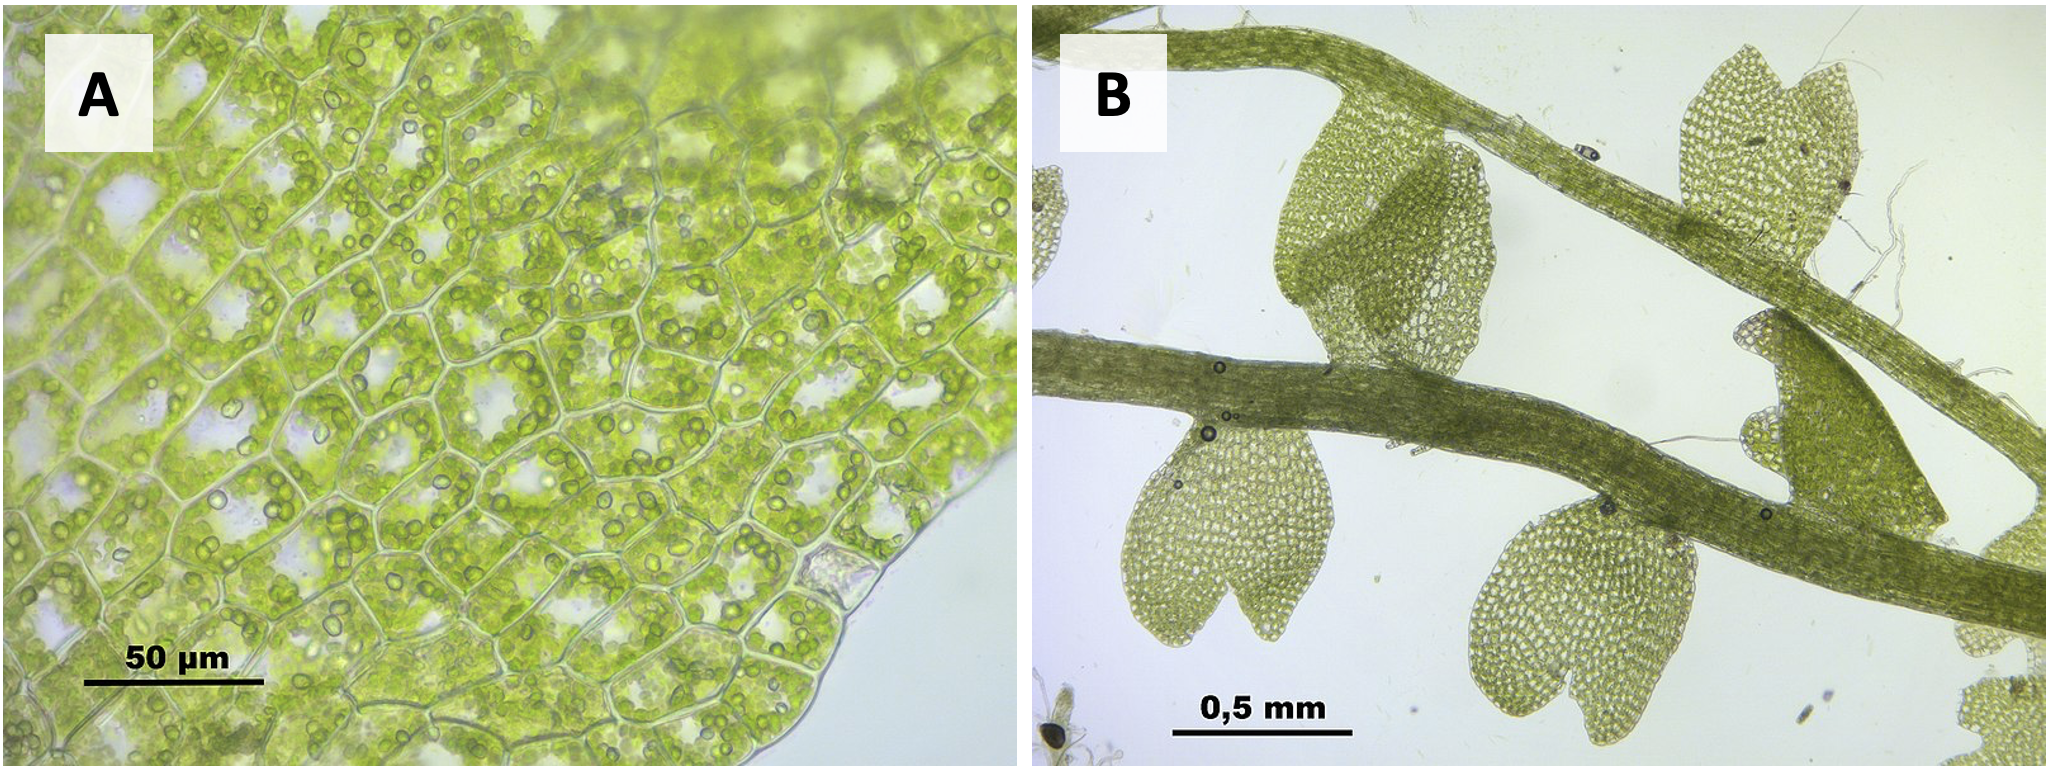
The most basic type of light microscopy is called brightfield microscopy because white light passes directly through the specimen, and the background (field) is fairly bright. The specimen must be relatively transparent for this technique to work; thick or opaque specimens will block the light. For example, the thin leaves of the plant Cladopodiella fluitans allow for excellent visualization of cells within them (Figure 2.4). Thicker samples must often be chemically fixed (preserved) and sliced into sections that are thin enough to allow light through.
Many cells are almost completely transparent, which makes it difficult to distinguish different components. For example, you cannot view a nucleus in any of the cells in Figure 2.4 because the nucleus has no colour, while you can view the chloroplasts because they are naturally green. Cell biologists can use stains: dyes that stain specific components of cells to aid with visualization. For example, Hoescht is a dye that stains DNA, allowing us to see chromosomes (Figure 2.1). However, most dyes are toxic to cells, and cannot be used on living specimens.

Phase contrast and differential interference contrast microscopy
A number of types of light microscopy have been developed to facilitate viewing of live specimens without staining. Phase contrast microscopy uses a phase plate (optical material placed above the objective lens) to help create contrast between light that moved through transparent specimens, allowing better visualization of internal cell structures. For example, the nucleus in a human cheek cell is difficult to see with traditional brightfield (Figure 2.5a) but much easier to see under phase contrast (Figure 2.5b). Differential interference contrast (DIC) microscopy uses similar principles to phase contrast microscopy, but uses multiple pieces of equipment (polarizer, analyzer, Wollaston prisms) to manipulate and detect light passing through the specimen, often allowing easier visualization of the edges of cells, as you can see in some budding yeast cells (Figure 2.5c).

Fluorescence microscopy
Finally, fluorescence microscopy is a specialized type of light microscopy that relies on light being emitted from (rather than transmitted through) a specimen. Instead of using white light, fluorescence microscopy transmits usually a single colour of light (e.g., blue) towards the specimen. This is called the excitation light. When the excitation light hits the specimen, fluorescent molecules will absorb the light and then emit light of a different colour (e.g., green) with longer wavelengths. This emission light travels up through the objective and ocular lens, while the emission light is prevented from doing so. What the user then sees is light only from the fluorescent molecules against a dark background.
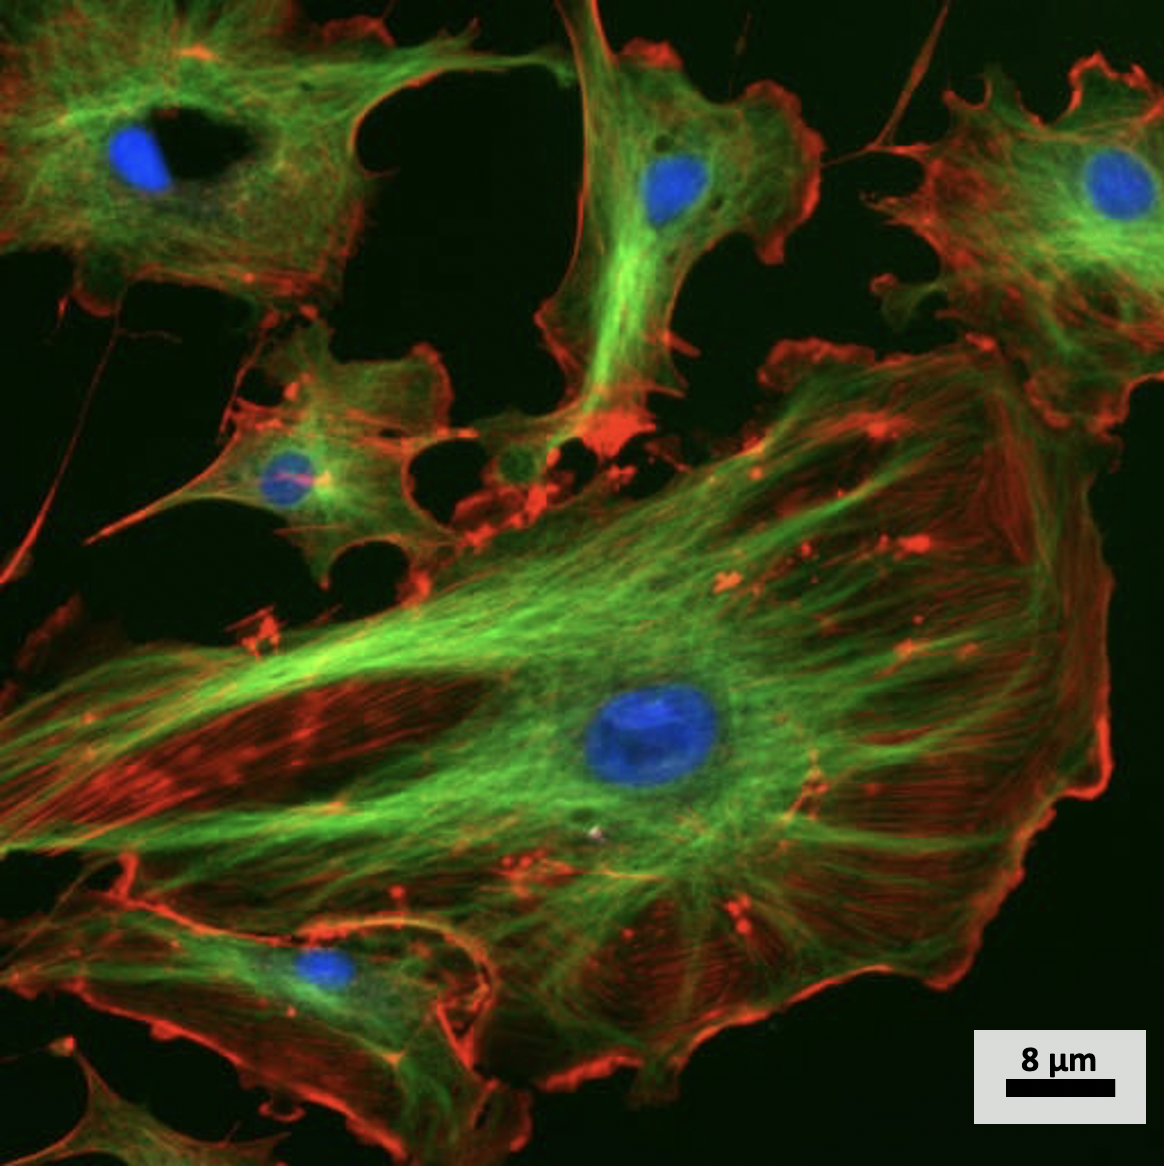
Some molecules are naturally fluorescent, such as chlorophyll in plant cells. Most often in fluorescence microscopy, the cells are stained with a fluorescent molecule that specifically binds to (and highlights) something of interest in the cell. For example, the cells from a cow’s artery in Figure 2.6 have been stained with three different fluorescent molecules that bind to DNA (blue) and different parts of the cytoskeleton (green, red). Although structures like the cytoskeleton are usually too small to see with light microscopy (actin is only 7 nm wide!), the fluorescent dyes show us where those structures are located, allowing us to further understand internal cell structure.

Electron Microscopy
In contrast to light microscopes, electron microscopes (Figure 2.2b) use a beam of electrons instead of a beam of light. Not only does this allow for higher magnification, it also provides higher resolving power, allowing us to see much smaller structures than with light microscopy. This major technical breakthrough was developed by Max Knoll and Ernst Ruska in 1931 in Germany. They used the principle that electrons have wave-like properties (like photons in light), but the wavelengths of electrons are much shorter than that of light, allowing for a lower limit of resolution and a higher resolving power. As you might imagine, electron microscopes are significantly more bulky and expensive than light microscopes. Because electrons have short wavelengths, they move best in a vacuum. We therefore cannot view living cells with an electron microscope because cells cannot survive in a vacuum. There are two main forms of electron microscopy: transmission electron microscopy (TEM) and scanning electron microscopy (SEM).
Transmission electron microscopy (TEM)
With TEM, electrons are transmitted through the specimen, similar to light used in a compound microscope. Specimens must be very thin for TEM to work. Thus, all TEM specimens must be fixed, embedded, and sliced into these thin sections. The sections are then usually stained to highlight certain structures such as membranes. The level of detail with TEM is truly amazing. If you compare the chloroplast from Figure 2.7 (TEM) with the chloroplasts from Figure 2.4a, you can truly see the level of detail that is possible with electron microscopy.

Scanning electron microscopy (SEM)
In SEM, a beam of electrons moves back and forth (“scans”) across a specimen’s surface, creating details of surface characteristics. For example, in Figure 2.8 you can see a few Salmonella bacteria infecting human cells. Note that these bacteria are about the same size as the chloroplast in Figure 2.7, but rather than seeing internal structure we are seeing their surface characteristics. Specimens do not have to be thin for SEM (although they cannot be larger than the microscope space allows for). To prepare samples for SEM, the surface of the specimen is usually coated in something (e.g., a thin layer of gold) that conducts electrons well.


